Tractor Light Bars: How to Choose, Mount and Use Them Legally
In this guide
- What a tractor light bar is and how it differs from individual work lights
- When a light bar is the right choice for a tractor
- Light bars on combines, sprayers and telehandlers
- How to choose a tractor light bar
- Sizes, outputs and beam patterns
- Where to mount a light bar on a tractor
- Voltage, amp draw and wiring
- How to mount a tractor light bar step by step
- Are tractor light bars road legal?
- Light bar care and common faults
- Buying mistakes to avoid
- Frequently asked questions
A tractor light bar is a long LED work lamp in one housing, fitted to the cab roof, bonnet or grille to give a wide, even spread of light for night fieldwork from one bracket and one cable. Most run on 12V and 24V, are sealed to IP67 or better, and must be switched off on the road.
Light bars suit combines, large tractors, sprayers and telehandlers where a single high-output unit is neater and quicker to fit than a row of separate work lamps. This guide covers how a light bar differs from individual work lights, when it is the right choice, how to choose one (length, lumens, beam pattern, voltage, mounting and EMC), where to mount it, how to wire and fit it step by step, and the Irish road rules.
What a tractor light bar is and how it differs from individual work lights
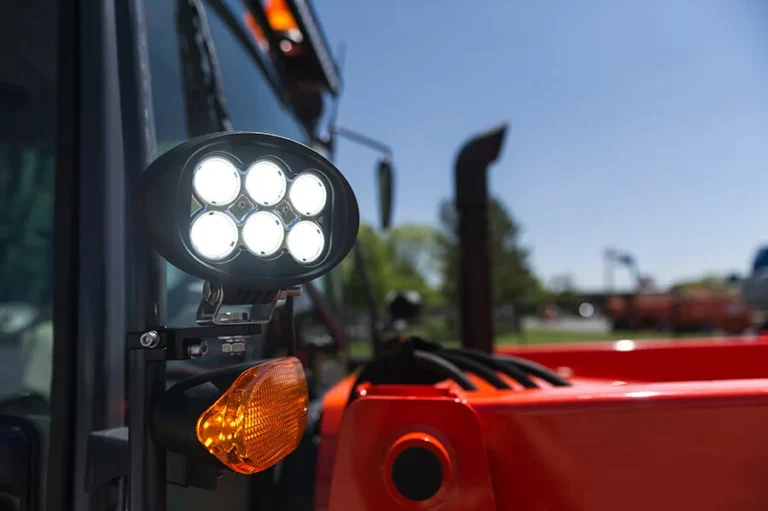
A tractor light bar is a multi-LED lighting unit in an elongated housing, usually an aluminium body with a polycarbonate lens. Inside, a row or 2 rows of LEDs sit behind individual reflectors or optics, driven by an internal power supply (the driver) that turns the tractor’s 12V or 24V supply into the constant current the LEDs need. Typical bars run from about 200 mm to 1,200 mm long and from under 20W to 300W.
Three features separate a light bar from a set of individual work lights:
- Form factor. The long, narrow shape gives a wide, continuous beam without the dark gaps between separate lamps.
- One mounting. The bar uses one pair of brackets and one cable run instead of a bracket and a cable for every lamp.
- One switch. One positive feed and one earth, switched through one relay, against 4 to 8 circuits for a set of individual lamps.
The aluminium body is the heatsink. LEDs lose output and life when they run hot, so a bar with a deep, finned body copes better with long summer nights than a thin one. The lens is sealed to the body with a gasket or bonded joint for IP67 or higher ingress protection, and better bars have a breather vent that stops condensation forming inside.
Light bars come in the same 3 beam patterns as other work lights: flood (wide, close-range), spot (narrow, long-range) and combo (both in one housing). The quality of the LEDs, optics and driver affects real output, colour and life far more than the headline wattage does.
When a light bar is the right choice for a tractor
A light bar is the right choice when you want a wide, continuous strip of light at one height from one bracket and one wiring run. Individual lamps are the better choice when you need beams aimed in different directions or there is little flat mounting space.
Where a light bar wins
- Long forward throw over open fields, where an even sheet of light across the full width ahead is more useful than several pools of light.
- Cab roofs without work-light brackets, where one bar on 2 brackets fits far faster than 4 separate lamps.
- Simple retrofits, where running 1 cable and 1 relay avoids modifying the loom for several new circuits.
- Replacing a tired multi-lamp set-up, where several old halogen lamps have failed and one bar gives a clean restart.
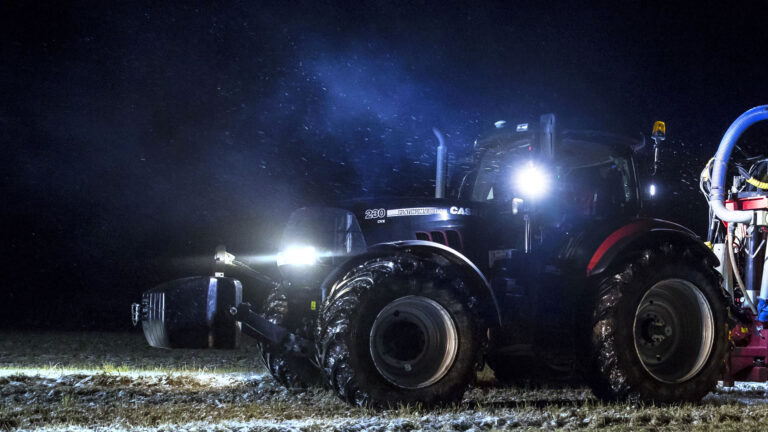
- High-output harvest work, where total light matters most. A combine’s wide, flat cab roof is the classic place for a long bar.
Where individual lamps win
- Separate tasks, such as one lamp on the trailer being filled, one on the field ahead and one on the headland, where independent aim matters more than continuous coverage.
- Limited space, such as compact and utility tractors with curved roofs or no roof rail, where a long bar won’t fit but 2 round lamps will.
- Redundancy, because a single failed lamp leaves the rest working, while a failed bar takes out all the forward light at once.
Three questions decide most cases. How many separately aimed beams do you need? Three or more points towards individual lamps. How much flat mounting length do you have? Less than about 250 mm rules a bar out. Is a single point of failure acceptable? For occasional fieldwork, yes; at harvest, when downtime is expensive, many operators keep a second lighting circuit as a backup.
Light bars on combines, sprayers and telehandlers
The same principles apply to other farm machines, but each has its own priorities.
- Combine harvesters. The wide, flat cab roof takes a long bar easily, and harvest nights reward total light. A combo or flood bar at the front of the roof lights the header and the crop ahead; separate lamps usually cover the unloading auger and the grain tank, because those need light aimed in other directions.
- Self-propelled sprayers. The priority is seeing the boom ends and the spray pattern. A roof bar lights the area in front, but boom lights or wide flood lamps aimed sideways do more for the outer nozzles. Keep bars away from where spray drift settles on the lens.
- Telehandlers. Loading work needs light on the forks or bucket at height. A bar on the cab roof helps in the yard, while a lamp on the boom head follows the load. Keep bars clear of the boom’s path when it is fully lowered.
- Loaders and compact tractors. Space is tight, so short bars of 200 mm to 450 mm on the roof edge or on the loader frame, aimed at the work area, usually beat one long bar.
On every machine, think about where dust and chaff collect and where the driver looks most, and light that area first.
How to choose a tractor light bar
Choosing a tractor light bar comes down to 7 specifications. Work through them in this order and most buying mistakes disappear.
1. Length
Measure the flat run available at the mounting point and allow about 50 mm clearance at each end for brackets and access. Most full-size tractor cab roofs take a bar of 600 mm to 1,000 mm at the front edge. Bonnet and grille positions usually take 200 mm to 450 mm. A bar that overhangs the cab corners catches hedges and gateposts.
2. Lumens, real and claimed
Lumens measure total light output. Many listings quote “raw” lumens, calculated from the LED chips’ theoretical maximum, rather than “effective” lumens measured from the finished lamp after losses in the optics, lens and heat. Effective output can be well below the raw figure, so compare like with like and treat very high numbers on cheap bars with caution. As a rough guide for forward lighting:
| Machine | Typical bar length | Typical effective output |
|---|---|---|
| Compact tractor, ATV or loader | 200 mm to 450 mm | 3,000 to 9,000 lumens |
| Mid-size tractor | 500 mm to 800 mm | 9,000 to 20,000 lumens |
| Large tractor, sprayer or combine | 800 mm to 1,200 mm | 20,000 lumens and up |
More light is not always better. Too much close-range light behind the bonnet causes glare off the bonnet and dust, and makes the darkness beyond look darker. Aim for usable light where you work, not the biggest number on the box.
3. Beam pattern
Choose combo for the front of the cab roof on a general-purpose tractor, flood for the rear of the cab and close-range work such as loading, and spot for long fields, headland turns and looking well ahead. The choice is explained in more detail in flood vs spot beam.
4. Voltage: 12V or 24V
Most tractors are 12V, and some larger machines, combines and plant are 24V. Most quality light bars accept both, usually marketed as 9V to 32V or 10V to 30V. A bar marked 12V only must not be fitted to a 24V machine without a converter. Check the data sheet, not just the listing title.
5. Mounting and brackets
Bars mount on end brackets that bolt to the bar’s side channels, or on a slide-in channel along the back. End brackets let the bar tilt for aim. Check the bracket hole spacing suits your roof rail or bracket, the fixings are stainless or plated steel, and the brackets are stiff enough not to resonate. A bar that vibrates on a thin bracket shakes its beam and its solder joints.
6. Ingress protection
IP67 is the minimum for a cab-roof bar on a working tractor. IP69K adds resistance to high-pressure, high-temperature washing, which matters on machines that get pressure-washed. Look for a breather vent and a sealed cable entry, because water usually gets in where the cable enters, not through the lens.
7. EMC and R10
LED drivers switch current at high frequency and can generate radio interference. UN Regulation 10 (R10) is the EMC approval for electrical parts fitted to vehicles, and a bar with R10 approval carries an E-mark with “10R” in the number. R10 radiated emission testing covers 30 MHz to 1,000 MHz, which protects FM radio and many two-way radio bands. It does not test the 1.2 GHz to 1.6 GHz bands used by GPS and other satellite systems, so R10 alone doesn’t prove a bar is quiet for auto-steer. On RTK-equipped tractors, choose a bar the maker states is suitable for use with guidance systems and test it with the receiver running before relying on it. Our guide to EMC compliant LED work lights explains the symptoms of interference.
When you have narrowed it down, browse our tractor light bars by length and beam pattern.
Sizes, outputs and beam patterns
Tractor light bars fall into 4 rough length classes. The figures below are typical ranges across the market, not fixed rules.
- Compact bars, 200 mm to 350 mm, typically 20W to 60W. They suit grille, A-pillar and bonnet positions, and work as a focused fill light alongside an existing set-up rather than as the main forward light.
- Mid-size bars, 400 mm to 650 mm, typically 60W to 120W. They fit most tractor cab roofs at the front edge of the roof rail and cover general forward lighting for most arable work.
- Large bars, 700 mm to 1,000 mm, typically 120W to 240W. They suit the wide cab roofs of large tractors and combine harvesters.
- Extra-large bars, 1,100 mm and over, up to around 300W. They fit the widest combine and self-propelled sprayer cabs and need a charging system with plenty of spare capacity.
Single-row bars use fewer, larger LEDs in one line and give a slimmer profile. Double-row bars pack more LEDs into the same length and give more light per millimetre, at the cost of more heat and current. Curved bars spread light wider at the ends and suit cab roofs where the outer edges of the beam need to reach the headland.
Beam pattern by job:
- Flood (roughly 60 to 120 degrees): wide-area light for loading, hopper unloading, trailer-side work and the area around the machine.
- Spot (roughly 10 to 30 degrees): distance throw for long fields, end-of-field manoeuvring and seeing the next tramline.
- Combo: flood optics at the ends and spot optics in the middle, or mixed along the bar. This is the default for the front of the cab roof, where both close work and distance matter.
Where to mount a light bar on a tractor
Mounting position decides what the bar actually lights. The same bar at 1.5 m lights a very different scene from the same bar at 3 m. There are 5 standard positions.
- Cab roof front, around 2.8 m to 3.2 m high. Throws light over the bonnet to the area ahead and clears the front loader and front implements. This is the main forward position for fieldwork and harvest. Typical bar length 600 mm to 1,000 mm.
- Cab roof rear, around 2.8 m to 3.2 m high. Lights the trailer being loaded, the hopper area and rear implements. A 500 mm to 800 mm flood or combo bar here gives the driver a clear view of rear work.
- Bonnet edge, around 1.0 m to 1.5 m high. A low, short bar for close-range obstacle spotting and gateways. Typical length 200 mm to 450 mm.
- Grille, around 0.8 m to 1.2 m high. A supplementary forward fill. Front weights and implements often block it. Typical length 200 mm to 350 mm.
- Front loader cross-tube, variable height. Follows the bucket, which helps for loader work, but the beam swings up and down with the arms and can dazzle when raised.
Three rules guide the choice. Higher bars light a wider zone, which helps general fieldwork. Lower bars are better for spotting obstacles at close range. Bars further forward suffer less bonnet shadow, which is why front-roof mounting beats rear-roof for forward work.
Voltage, amp draw and wiring
Current draw follows from the bar’s wattage and the system voltage: amps equal watts divided by volts. At 12V:
| Bar rating | Current at 12V | Current at 24V | Typical cable size (short run) | Typical fuse |
|---|---|---|---|---|
| 36W | 3A | 1.5A | 1.5 mm² | 5A |
| 72W | 6A | 3A | 1.5 mm² to 2.5 mm² | 10A |
| 120W | 10A | 5A | 2.5 mm² | 15A |
| 240W | 20A | 10A | 4 mm² | 25A to 30A |
Longer cable runs need a larger size to keep voltage drop down, so check the run length as well as the current. Size the fuse to protect the cable, at around 1.25 to 1.5 times the bar’s running current, and fit it on the positive side as close to the battery or supply point as practical, in a sealed fuse holder.
Any bar drawing more than a few amps should be switched through a relay. The relay carries the bar’s current on a short, heavy cable from the battery, and the cab switch only carries the small coil current. Switching a large bar directly through a dashboard switch overheats the switch. Take the relay’s coil feed from an ignition-switched supply so the bar can’t be left on with the tractor switched off. Our guide to wiring work lights to a 12V system with a relay covers the relay pins and switch wiring in detail.
How to mount a tractor light bar step by step
Fitting a light bar is a 1 to 2 hour job for a competent DIY installer. The steps below assume a 600 mm to 1,000 mm bar on the front edge of the cab roof. You’ll need a drill and bits, spanners, wire strippers and crimps, a multimeter, masking tape and a tape measure.
- Plan the position. Park on level ground and check the front edge of the roof for a clear, flat run that suits the bar’s bracket spacing. Mark the roof centre line with masking tape and position the brackets symmetrically either side.
- Fix the brackets. Use existing roof rail or work-light mounting points where you can. If you must drill, choose a flat, structurally sound part of the roof, deburr the holes and seal them on both sides before bolting through. Cab roofs on many tractors carry wiring and headlining underneath, so check what is behind before drilling.
- Fit the bar loosely. Bolt the bar to the brackets hand-tight so it can still tilt for aiming.
- Run the cable. Route it along the roof rail and down a rear cab pillar, inside the pillar trim or rubber where possible, to the battery or power distribution point. Secure it every 200 mm to 300 mm and keep it away from sharp edges, the exhaust and hydraulic lines.
- Fit the relay and fuse. Mount the relay near the supply. Connect the battery positive to the relay through the fuse, the relay output to the bar’s positive, and the bar’s earth to a clean chassis point or the battery negative.
- Fit the switch. Use a spare switch position in the cab. Feed the switch from a fused, ignition-switched supply and connect its output to the relay coil. A switch with a built-in tell-tale reminds the driver the bar is on.
- Test. Switch on and check the bar lights evenly along its length with no flicker. If it doesn’t light, check the fuse, then the relay, then the earth, then the switch.
- Aim. At night, park 8 m to 10 m from a wall and adjust the tilt so the brightest part of the beam falls where you need it. For a combo bar on the cab roof, aiming slightly below horizontal avoids lighting the sky. Then tighten the bracket bolts fully.
- Weatherproof. Seal any unsealed crimps with heat-shrink or self-amalgamating tape, grease relay and connector terminals, and refit grommets where the cable enters the cab or pillar.
- Record it. Note the bar’s wattage, fuse size and relay position in the tractor’s service records. It saves time on future fault-finding.
Browse our tractor LED work lights if you decide individual lamps suit part of the job better, for example on the rear of the cab.
Are tractor light bars road legal?
Tractor light bars are legal to fit but, in almost every case, not legal to use while driving on the road. There is no specific Irish rule on roof-mounted LED light bars, so on a public road they fall under the general rules in the Road Traffic (Lighting of Vehicles) Regulations 1963, as amended: only permitted colours (white or yellow to the front, no white to the rear except reversing lamps), no lamp that can dazzle, and no lamp that could mislead other traffic. RSA guidance says work or ploughing lamps may be used on private land but must be switched off before using the public road, and rear white lights are banned on the road. Most light bars are work lamps, so treat yours the same way.
The Rules of the Road also point out that fitting optional lighting is controlled by law. Get professional advice before fitting spot lights or other add-ons for road use, and tell your insurer. Very few agricultural light bars carry approval as a driving lamp.
The practical rule is to switch the bar off at the field gate. Wire it through an ignition-switched relay with a tell-tale, and keep the tractor’s road lights (headlamps, sidelights, indicators, beacon and number plate lamp) on their own circuits so they work independently of the bar. For E-marks and covering off-road bars, read are LED light bars road legal.
Light bar care and common faults
A good light bar needs very little maintenance, but the conditions on a tractor roof are hard on any lamp. A few checks at the start of each season and after pressure washing keep it working.
- Clean the lens. Dust, chaff and spray residue cut output noticeably. Wash with water and a mild detergent; solvents and abrasive pads can craze a polycarbonate lens.
- Check the brackets. Vibration loosens bolts over a season. Re-tighten them and check the bar hasn’t been knocked out of aim by a branch or a low doorway.
- Look for condensation. A little mist that clears after a few minutes is normal on some bars. Water pooling inside the lens means a failed seal or a damaged cable entry, and the bar should be repaired or replaced before the driver board corrodes.
- Inspect the cable. The cable where it leaves the bar and where it enters the cab is the usual failure point. Replace chafed sections rather than taping them.
The most common light bar faults have simple causes:
- Bar dead. Check the fuse, then the relay (swap it for a known good one), then the earth, then the switch. Measure voltage at the bar’s plug with the switch on.
- Bar flickers. Usually a poor earth or a loose connector, sometimes low voltage from undersized cable. On some cheap bars the driver flickers as it overheats.
- One section dark. A failed LED string or driver channel inside the bar. On a sealed bar this is rarely repairable.
- Radio crackles or the guidance signal drops when the bar is on. Electrical interference from the driver. Re-route the bar’s cable away from aerial leads, check the earth, and if it persists, replace the bar with a quieter one.
Buying mistakes to avoid
- Buying on lumen claims alone. Raw lumen figures on cheap bars are often far above the light actually delivered. Compare effective lumens and look at the beam, not just the number.
- Ignoring voltage range. A 12V-only bar on a 24V machine fails quickly. A bar designed for 24V may run dim or flicker on 12V.
- Skipping EMC on a guidance tractor. A noisy driver can disturb radio and, on some installations, satellite reception. Check R10 and the maker’s guidance on GNSS, and test before relying on it.
- Undersized wiring. Thin cable on a big bar drops voltage, dims the light and heats up. Size the cable for the current and the run length.
- Weak brackets. A long bar on thin brackets vibrates, shakes the beam and fatigues the fixings.
Frequently asked questions
What size light bar do I need for a tractor?
Measure the flat mounting length and leave about 50 mm at each end. Most full-size tractor cab roofs take 600 mm to 1,000 mm at the front edge. Compact tractors and bonnet or grille positions usually suit 200 mm to 450 mm.
Is a light bar better than work lights on a tractor?
A light bar is better for a wide, even beam from one fixing and one cable. Individual work lights are better when you need beams aimed at different jobs, have little flat mounting space, or want the redundancy of several separate lamps.
Do I need a relay for a tractor light bar?
Yes, for anything drawing more than a few amps. A relay keeps the bar’s current off the cab switch and lets you use a short, heavy cable from the supply. Feed the relay coil from an ignition-switched circuit so the bar can’t be left on.
How do I stop my light bar flickering?
Check the earth first: clean the earth terminal to bright metal and tighten it. Then check the connectors for corrosion and the cable size for the bar’s current. If the wiring is good and the bar still flickers, the internal driver may be overheating or failing.
Can a tractor light bar interfere with GPS?
It can. LED drivers can emit radio noise, and R10 approval only tests emissions up to 1,000 MHz, below the satellite navigation bands. On a tractor with auto-steer, choose a bar stated as suitable for guidance systems and test it with the receiver running.